Using Virtualenv in Python

Professional Services Team Lead
AWS Solutions Architect
Well Architected Team Lead
Certs:
AWS Certified Solutions Architect - Professional
AWS Certified DevOps Engineer - Professional
AWS Certified Solutions Architect – Associate
AWS Certified Developer - Associate
AWS Certified Cloud Practitioner
ITIL v3 Foundation
SVQ 3 Management
Keeping track of which external software libraries you have used in your programs and what the requirements are for running your code is a key part of good coding. Being able to get your code up and running on a new install or just knowing which dependancies you have is vital to keep track of.
With python, this is made simple through the use of the Virtualenv package and pip for installation.
Virtualenv
Virtualenv is a python package that allows you to create an isolated environment so that all of the packages you install and the version of Python used to create the environment so you have everything set up the way you need it.
Virtualenv is its own set of packages and libraries, however a subset of the features has been part of the core python install since Python 3.3. This post will focus on installing and using Virtualenv this way and will require at least python 3.3, though unless you have a specific need for it, I would recommend using the latest version of Python, which at the time of writing is 3.9.
I will also perform the commands in this post in the mac terminal. Linux commands are largely the same. If you are using Windows, you may need some changes.
Creating a Virtualenv
Full instructions are on the Python page, however I will provide the key steps you need.
https://docs.python.org/3/library/venv.html
First step is to ensure you have Python 3 installed (2.x is supported, but the commands in this post are for 3.x).
Typically, I would use Virtualenv with a GitHub checkout, so I would have a new directory to use. You can also do this on any setup if not using Git.
In your directory, run the command below
python3 -m venv .env
This will create a directory in the current directory. If you wish to store the Virtualenv setup else where, change the .env to your chosen directory.
Also, if you use GitHub and choose the .gitignore template for python .env is already in the list so you don't submit it as part of your commits.
This will create files in the .env folder as shown below:
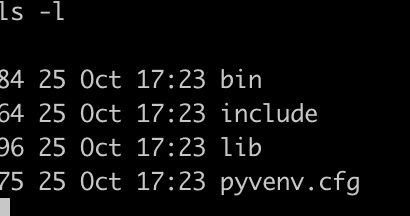
For most uses, the only one you will need to know about is the activation in the bin directory.
To switch into your new environment, in your base directory run:
source .env/bin/activate
This activates your environment and your terminal prompt will show the active virtual environment in use.

To come out of the virtual environment you can type:
deactivate
Installing packages (Example)
To illustrate use of Virtualenv, I will show the steps required to ensure Boto3 (The AWS Python library) is installed, and how to produce a list of requirements.
If you are using Python >= 3.4 or when you create a Virtualenv, you should already have pip installed, usually under pip3 for Python3.
If not, there are further instructions here on how to set it up, including a curl command to get it directly: https://pip.pypa.io/en/stable/installing/
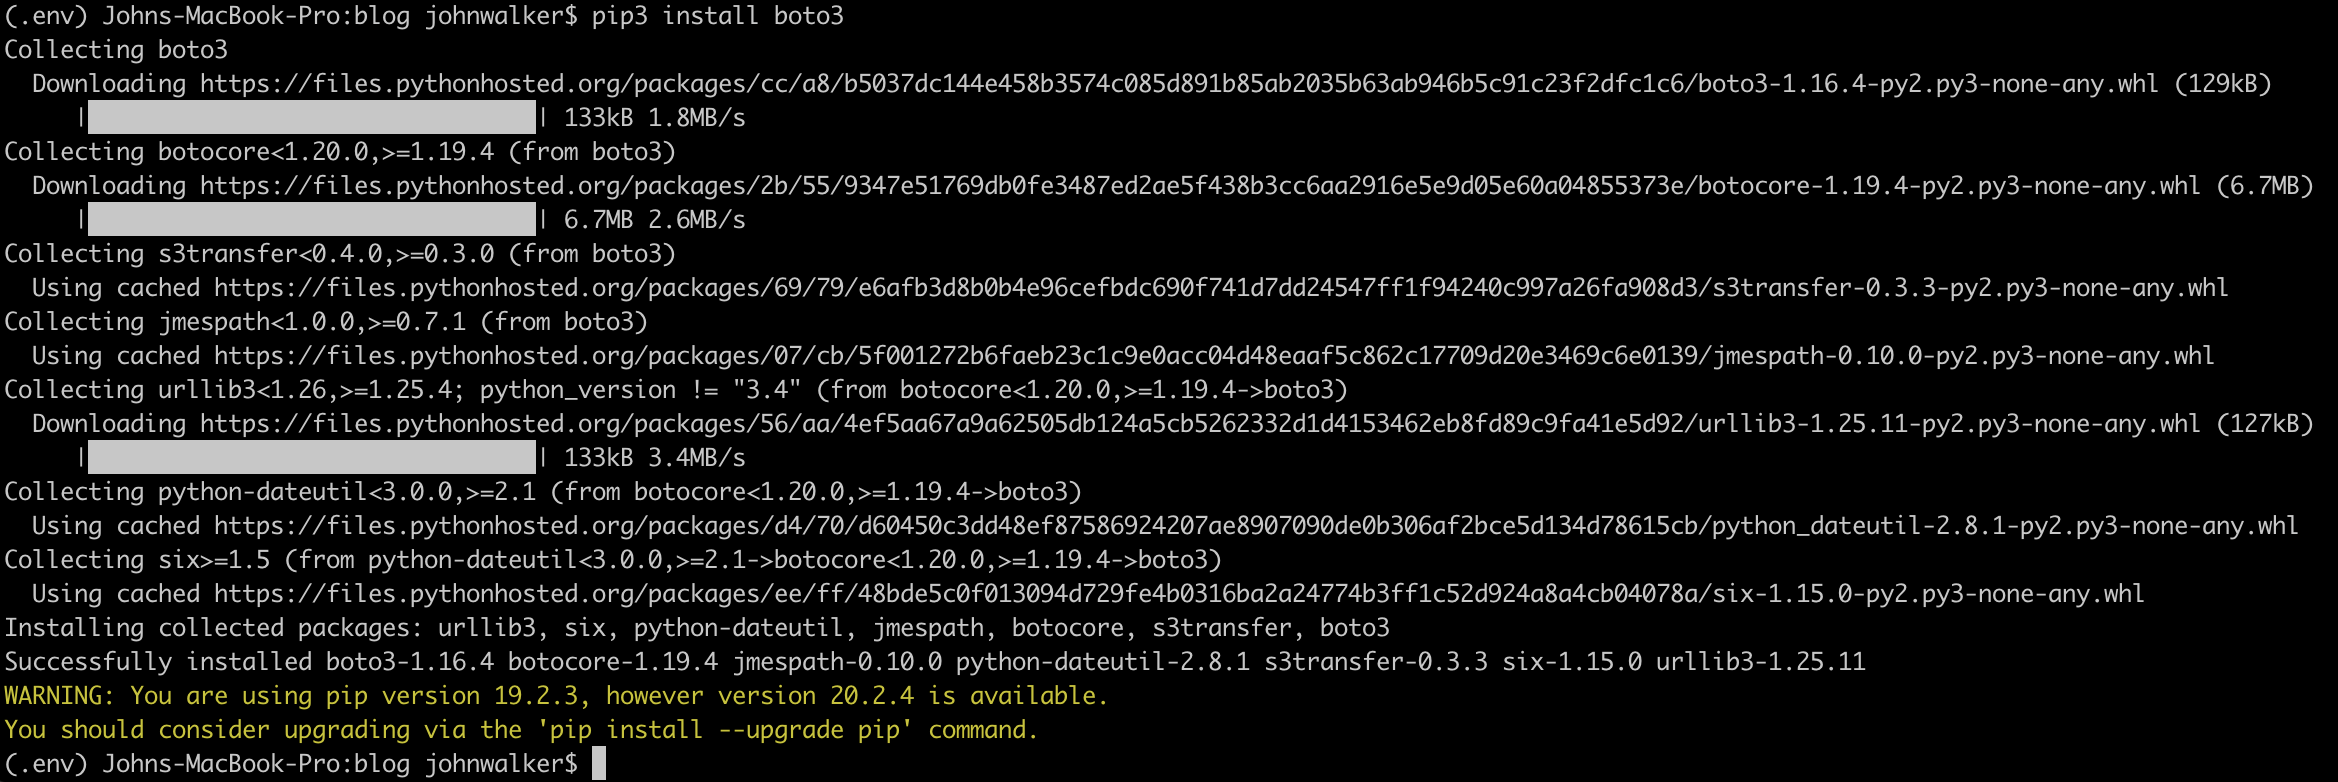
Once you have pip installed, you can now install Boto3, for use with AWS. This isn't required for Virtualenv, you can use any packages you need.
pip3 install boto3
From there, you can write the code you need and install any further packages.
Installed Packages and Requirements
Once you have finished your coding for the moment, it's good to figure out which packages you have installed. You can then also turn this into a list of requirements so that a fresh install has a list to work from.
To find out your existing packages run:
pip3 freeze
And you will get a list like this:

You can then turn this into a list of requirements just by redirecting the output to a text file:
pip3 freeze > requirements.txt
Installing requirements from a new install
Once you have everything completed and you are going to use your code somewhere else (perhaps inside a Docker container or a CodeBuild process) then you will need to install your requirements.
Pip is very useful to perform this task, and the command is straightforward:
pip3 install -r requirements.txt
This will go through each of the requirements produced by the freeze command and ensure they are installed or if the requirement has already been met.

This allows you to get all the packages you need to run the code. This isn't specific to Virtualenv, and can be used with a manual requirements.txt, it's just very useful when combined with Virtualenv.